new BB shell
following my discovery that my Deda ZeroTre 29.9 x 17 mm oval chainstays don't fit in my Long Shen OS BB shell (see this frameforum thread), i've ordered a new Walter shell from Joe Bringheli.


the most recent changes; R. Sachs story
modified the description on the right there to reflect the way the design has progressed. low-trail bikes aren't especially common these days so it seems right to point out that aspect of this one.
in the latest Rivendell Reader (#38), Grant Petersen mentions that their new A. Homer Hilsen has braze-on mounts for the Nitto Mark's Rack. this struck me as a great idea for my bike, as i'm likely to frequently use it with a handlebar bag, when a full-blown lowrider rack would be overkill. i emailed Grant to find out the correct placement for the braze-on, and his reply came the same day:
The Mark's rack is adjustable. We put the braze-ons about 145mm down the blades from the top of the crown, but you can be off by inches and it'll still work. But 145 looks good, I think. It's a great little rack, really useful..
So it looks like the fork will have two sets of rack braze-ons: one for Mark's Rack at the aforementioned spot and another for a lowrider rack at 165 mm from the bottom eyelet, which appears to be the standard from what i've read in the archives. both will be the somewhat-garish hourglass kind, which one brazes to the front side of the blade.
At least for now, i plan to get an Ostrich handlebar bag from V-O.
finally, this email exchange with Richard Sachs made my day.
I wrote to e-Ritchie one August afternoon:
e-Ritchie replied 4 minutes later:
address?
He sent them a week later, and a few days after that the box arrived. inside: not one, not two, but five blade stiffeners. he even took care of postage. hell of a guy.
in the latest Rivendell Reader (#38), Grant Petersen mentions that their new A. Homer Hilsen has braze-on mounts for the Nitto Mark's Rack. this struck me as a great idea for my bike, as i'm likely to frequently use it with a handlebar bag, when a full-blown lowrider rack would be overkill. i emailed Grant to find out the correct placement for the braze-on, and his reply came the same day:
The Mark's rack is adjustable. We put the braze-ons about 145mm down the blades from the top of the crown, but you can be off by inches and it'll still work. But 145 looks good, I think. It's a great little rack, really useful..
So it looks like the fork will have two sets of rack braze-ons: one for Mark's Rack at the aforementioned spot and another for a lowrider rack at 165 mm from the bottom eyelet, which appears to be the standard from what i've read in the archives. both will be the somewhat-garish hourglass kind, which one brazes to the front side of the blade.
At least for now, i plan to get an Ostrich handlebar bag from V-O.
finally, this email exchange with Richard Sachs made my day.
I wrote to e-Ritchie one August afternoon:
It's hot like a freshly brazed frame here and I'm working (inside) on
cleaning up my frame parts. Went outside to grab the WD-40 to keep
everything shiny, sanding one of your fork blade stiffeners on the
way. Got to a particularly sticky part, sanded a little too hard, and
that combined with the heat (?) caused the thing to bend in half right
at the club cutout.
Is it possible to get a replacement for it--or, why not, a pair?
cleaning up my frame parts. Went outside to grab the WD-40 to keep
everything shiny, sanding one of your fork blade stiffeners on the
way. Got to a particularly sticky part, sanded a little too hard, and
that combined with the heat (?) caused the thing to bend in half right
at the club cutout.
Is it possible to get a replacement for it--or, why not, a pair?
e-Ritchie replied 4 minutes later:
address?
He sent them a week later, and a few days after that the box arrived. inside: not one, not two, but five blade stiffeners. he even took care of postage. hell of a guy.
filing fotos

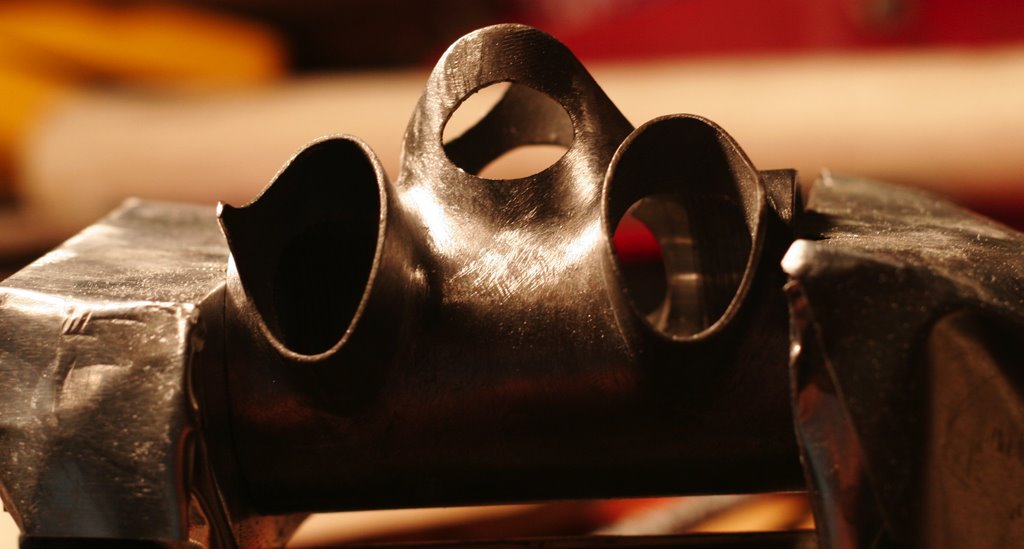
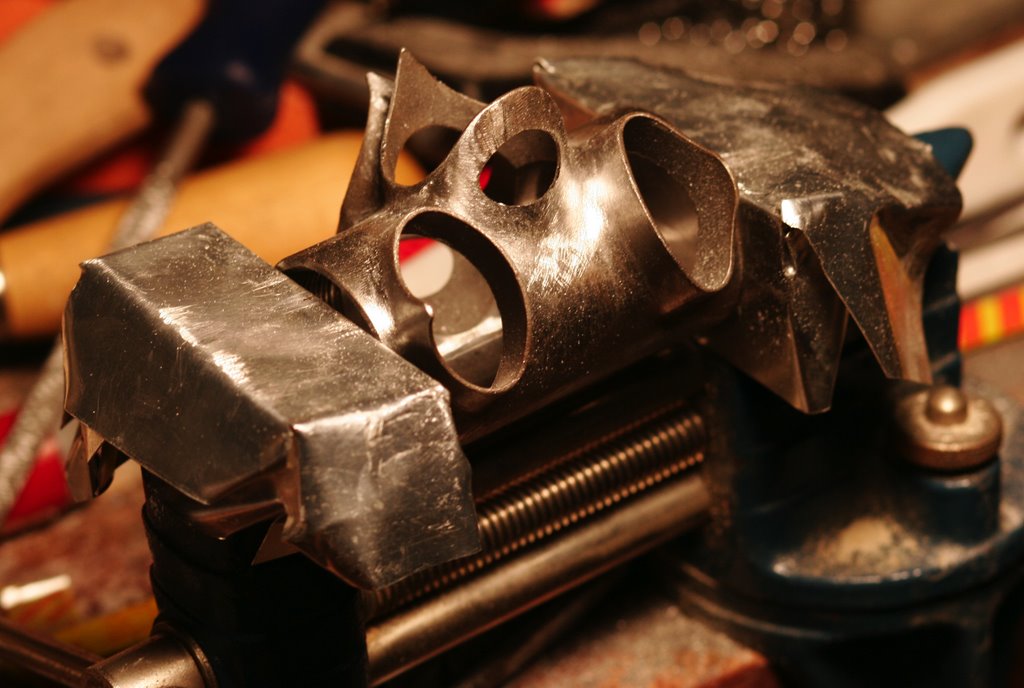

one perk of being a photojournalism student for a couple semesters is that i've got a bitchin' digital SLR. i took it down to my little shop a few minutes ago after a rigorous filing session. notes on the above:
• most of the pre-brazing cleanup of the lugs is done. the BB shell has proved the trickiest, both because of its greater surface area and because it has several tight valleys that are impossible to get into without rifflers. the rifflers seem coarser than the needle files, which makes it harder to precisely file away a specific area, although it also means fewer individual strokes are requires to remove the same amount of material.
• note that i enlarged the hole in the ST and DT sockets. it was a smaller oval shape...i like the larger pseudo-circular window, both for aesthetics and because it will reduce slightly the mass of steel to heat before brazing. i also rounded off the right chainstay socket point, to reduce the possibility of the shell piercing into the chainstay. not absolutely necessary, but i like the look and i'll sleep better at night. i did the same to the bottom head lug's bottom DT point, based on a piece on the Rivendell site. i may go ahead and round off more points, probably starting with the left CS socket for symmetry. the shell is Long Shen LB106, visible in the raw here.
• most of the heavy-duty reshaping i'm doing with a cheap 6" bastard round from the hardware store, several chainsaw files of various widths, and an 8" Nicholson mill bastard. the 80-grit aluminum oxide abrasive cloth i got from Enco is coming in handy here and there as well. i bought the round file after my Enco order, but i'm actually glad i didn't spluge on a nice one because i'm beating up on it pretty badly with all this reshaping. i have a jeweler's saw as well, but i reckon the file is faster for opeing up holes. haven't tried it yet, though.
• Talbot recommends saving most of the cleanup for after brazing, to avoid wasting time in case of a brazing mistake. i'm disobeying him for several reasons: i have free time now, and i'll have less after the brazing is done. i plan to have enough practice brazing that i won't make any big mistakes on the real thing. and i suspect this kind of intricate filing will be easier with the parts easily accessible from all sides, as they won't be once they're brazed around tubes.
• note as well the ghetto-fabulous soft jaw covers on the vise. they're made by bending pieces of aluminum flashing over the jaws. works OK for now, but not durable or sophisticated. i found the flashing at Home Depot in the roofing aisle, for about 32¢ for a 4 x 6" rectangle. picked up about 10 so i can replace as needed.
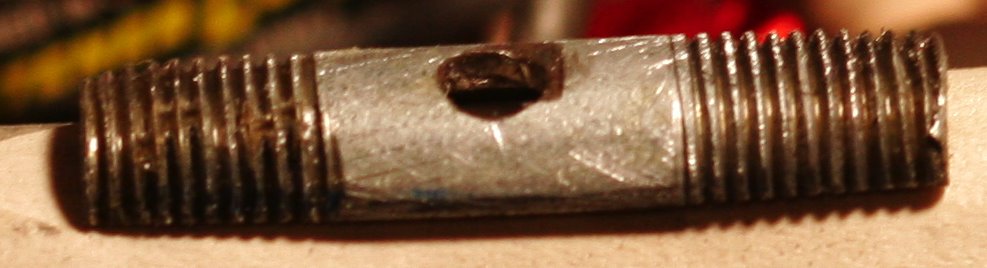
also included is a photo of the 3/8" pipe nipple modified for use with the fork bending mandrel. pretty simple to make...i bought a high-tension hacksaw and 32t blades that made the cutting take only a few minutes. i forgot to use oil when drilling the hole--big mistake--so i'll have to drill out the remaining scraps of steel later on.
Subscribe to:
Posts (Atom)

 Posts
Posts


