Bill Mollison on education

Alan: So permaculture seems to be as much a change in perception as anything else - a change in where one begins to look at things from.

Bill: I think that's right. For me, having suffered through a Western education, it was a shift from passive learning - you know, "this is how books say things are" - to something active. It's saying (and this is a horrifying thought for university people) that instead of physicists teaching physics, physicists should go home and see what physics applies to their home.

Now, they may teach sophisticated physics at the university. But they go home to a domestic environment which can only be described as demented in its use of energy. They can't see that, and that blindness is appalling.

Why is it that we dodn't build human settlements that will feed themselves, and fuel themselves, and catch their own water, when any human settlement could do that easily? When it's a trivial thing to do?

via In Context

How Not to Sell Wine

Girl at the Whole Foods wine desk last night:
"This is really good--it got, like, 90 points!"

Oh! Wow! 90 points! I like how you didn't even tell me who gave it 90 points.
Cuz that's what I was worried about--the number. I dragged my ass out here to Glen Allen so I could buy pricey organic sulfite-free wine based on what some magazine thinks of it. Y'know, cuz wine is purely a status symbol, not something I'd drink to enjoy. I'm sniffing, sipping, and scrutinizing the tastes you're pouring out of that $20,000 machine--but it's all for show. Thank you for finally telling me the damn number so I can get out of here. I hate wine.

Buying wine based on a number is like dating a girl with a big chest based on her bra size. It's a number just for show. The wine thing is actually worse--it's subjective.

Holiday gift-giving guide for the literate, sustainable urbanite

I have a few books out on inter-library loan right now, any of which would make great presents for me, preferably via a used book place like Alibris, Amazon.com Marketplace, Abe Books, half.com.

- The Big Neccessity: Adventures in the World of Human Waste by Rose George. Despite being a book about shit, this is actually very well-written. Sorta like Rats, the author is thoroughly obsessed and it shows.
via AIDG's blog

I am continuing to explore traditional skills, craft, and food, with an eye towards sustainability and applicability to urban settings.

Sarah said:
With the holidays approaching and the economy in crisis, I thought I'd send around an email with the things on my holiday wish list so you can help stimulate the economy by shopping!

If that fails to do the trick and the economy collapses, it's good to have a backup plan or three. Consider these as long-term investments in our continued collective existence:

- Gene Logsdon's Practical Skills: A Revival of Forgotten Crafts, Techniques, and Traditions was last published in 1985 but is available used. Despite being a how-to manual, this is actually very well-written. Logsdon 'gets' the sustainability piece, and a lot of his advice could apply to an urban setting.

Topics include:
Hoemanship
The gentle art of coggling
Grafting skills anyone can learn
How to avoid milking your cow daily

- When Technology Fails: A Manual for Self Reliance & Planetary Survival by Matthew Stein has a bit more of a survivalist bent that sounds more and more appropriate for the times. Described somewhere as similar to the Whole Earth Catalog, so it must be good.

- The Encyclopedia of Country Living: An Old Fashioned Recipe Book by Carla Emery is truly encyclopedic, written by a lifelong Montanan.

There are other encyclopedic guides to "country living" that I haven't looked at yet, like Storey's Basic Country Skills.

Blogwise Blog on Blogging Bloggily


In response to a recent [Frame] thread on the pros and cons of a website vs. a blog for the framebuilding set...

- You need both, ideally. They can serve two different purposes and two different sets of clients.

- As has been discussed, there's a chasm of difference between writing a blog and writing a blog *for money* (or as part of a larger business plan/marketing strategy).
Doing it without involving money is great. I write this having failed at a meager attempt to turn blogging about framebuilding into a money-making proposition. It's more enjoyable this way, and anyway, about 30 people a week keep coming back for more.

- What one is doing by having an 'internet presence' is building a name for oneself, not selling bike frames. The Flickr, the blog, participation on the [Frame] list--none of it needs to be (directly) about making a buck. It's about building a brand for oneself, which is in turn part of making a buck. See, I'm building my brand right now, just by typing this, and I'm not even trying to sell anybody anything (yet).

In business school terms:
- A strong brand creates a competitive advantage that is wholly inimitable. No one but Jon Q. Builder can produce a "Jon Q. Builder" frame, because the value of the frame is tied to the reputation of the maker.
- Even, say, Wal-Mart* doesn't have such a good competitive advantage, because, with enough money and resources, anyone could copy Wal-Mart's business plan.  In contrast, a "Jon Q." is inherently more valuable than a non-"Jon Q.", even if the latter is cheaper or has a shorter lead time.
- The brand and the presence are assets with real dollar values (although calculating the exact values is a different story). If Jon Q.'s web presence is competitive, then it will be a stable asset.

- The world of professional art is full of people who understand how to gracefully cultivate a brand. Besides that, it's loads of white wine.

- Richard Sachs is the prime example of a 'presence'. Go see how often he posts to his Flickr. Jonny Cycles also comes to mind, ever since he got that fancy digital-camera-direct-Flickr-uploader thingy.

- There is a staggering quantity of framebuilding-related web content being produced. It's impossible to keep up with. There's easily a couple hundred blogs and Flickr streams. I'd bet that number has at least doubled in the 2.5 years I've been on this list. Don't get scared, though. Just figure out what you can offer that nobody else can.

All this is part of why the post about Chris Zanotti has been removed.

Errant Thoughts from 3 am

- This sentence is false.

- The Bike Fabricators club will be soon be getting more than $4000 funding for tooling and a brazing rig.

- Rhett Butler is my homeboy.

- A few projects have been brewing in the machine shop. I'll get down there with a camera sometime soon and do a big dump of photos.

On Grinder Safety

Here was the most interesting part of my day (so far):

I work as a 'Student Shop Foreman' in the machine shop of an engineering school.
A guy came in today who's been in pretty regularly in the few weeks I've been working here. He cut up some stainless sheet on the vertical band saw. No big deal.
Then he wanted to use the grinder to remove the burrs.
The only utility grinder we have is monstrous, like 12" wheels.
Sure, I say, just be careful 'cuz that thing can take your hand off.
So I walk away. And before he's even really gotten started, the plate gets snagged and wedges between the grinder support and the grinding wheel. Turned out the gap was set too big. Coulda happened to anybody.
All of us who had been chatting gathered around to watch the grinder spin down, partly out of curiosity, partly out of concern that the situation not get any more interesting.
And then he shows me his hand, which is bleeding from the thumb, cut pretty deep, but thankfully it was the burr that got him, not the grinding wheel.
First aid kit. Alochol wipes, sanitizing spray, gauze, bandages, anitbiotic ointment. Sink. Wash for a few minutes.
He's telling me about how he hates blood and needles and going to the doctor. He's pale in the face. Got him sitting down. He wants the trash can next to him. Turns down water but I send for some anyways.
At this point I'm running worst-case scenarios through my head while I keep pressure on his thumb. It's not a life-threatening cut, but if he passes out, things get more complicated. He could go into shock, and I don't remember exactly how to deal with shock (a blanket over them and call for an ambo maybe).
He ralphs into the trash for a couple minutes, while I change the gauze and maintain pressure. Then he picks his head up, color in his face now, he's back amongst the living, 100% fine.
That's one way to learn how to use a grinder.

Be careful, folks. Mind the grinder gap.

Bread (not bikes)

Even less bike-related material ahead--I do more cooking than framebuilding these days.

I started experimenting with sourdoughs a few weeks ago. It's fun...there's freakin' bacteria growing in my fridge. Only this time it's intentional.

This recipe is the closest I've gotten to a Platonicly perfect sourdough:
• most importantly, no serious time commitments and not a lot of work
• great texture, big holes, good crust, not too hard
• pretty sour tasting (could be sourer--stay tuned)

No-Knead Whole Wheat Sourdough

with ingredients from Breadtopia
and baking technique from Cook's Illustrated

1.5 tsp salt
1 C whole wheat flour
2.5 C bread flour (or maybe 2.75 C)
1.5 C water (ideally purified or at least de-chlorinated, but I don't bother)
2 Tbsp active sourdough starter (stir first to remove bubbles; should be firm, not runny)
~1 Tbsp vital wheat gluten

- Dissolve starter in water. Combine with remaining ingredients in a large non-plastic bowl. No need to mix very thoroughly, just be sure all the flour gets mixed in.
- Cover with plastic wrap. Refrigerate about 2 days.
- Remove from fridge. Let rise at room temperature about 18 hours.
- Turn out onto oiled surface. Oil fingers. Stretch dough out wide. Fold into thirds like an envelope, then in half to form a ball. Tuck edges under bottom.
- Place a sheet of oiled parchment paper in a 10" skillet. Place dough, folds down, on parchment. Cover loosely with plastic. Let rise 1-1.5 hrs.
- Place 5 qt dutch oven in oven and preheat to 500°F for 35-40 mins before baking.
- Discard plastic wrap. Make one slit in top of dough.
- Remove dutch oven carefully. Pick up the parchment by the edges and drop dough into dutch oven.
- Bake at 500°F for 30 mins, lid on, then at 450°F for 15 mins, lid off.
- Remove to cooling rack. Let cool before slicing...waiting is the hardest part.

Notes:
These baking times gave me a burnt crust on the bottom. YMMV.

Mix in some milled flax seed to make it even healthier.

High water content of this dough (like all no-kneads) means it absorbs flour like crazy--oil works better at keeping things unstuck.

I am constantly experimenting with different ratios of rye flour, whole wheat flour, and bread flour. Nothing conclusive yet.

I got my starter by sending a SASE to these nice folks. I recently started feeding my starters rye flour--it was on sale and I heard somewhere that sourdough likes rye flour.

On Soup

...in which our narrator has nothing to write about bikes or metal.

Buy the following at your farmer's market one Tuesday afternoon:

a two-pound beef roast
a bunch of turnips (save the greens for later)
a few little redskin potatoes
several sweet potatoes
4 Anaheim peppers, neither mild nor hot
2 sweet onions, medium-large

Roughly chop the veggies to about the same size. Throw everything in the slow cooker on high, along with:

a bay leaf
a cup or two of frozen homemade beef/chicken bone stock

- Go have a life for 4ish hours, until everything is cooked pretty well to death. Allow to cool.
- Transfer everything but the beef into a big mixing bowl.
- Mash/blend/stir until it seems like a good texture. (Bonus points if you have an immersion blender. I just have a hand mixer and a big wooden fork, but I brandish them with fervor.)
- Add kosher salt and enough freshly-ground black pepper to kill a small elephant. (Wintertime sickness=cold, slow, heavy; pepper=hot, light, airy.)
- Chop the roast against the grain so it crumbles into little slivers. Stir into the soupy stuff.
- Refrigerate/eat on for 2 days, then freeze in quart-size bags until the really busy part of the semester comes 'round.

The peppers add background spiciness. Other than that it's earthy and hearty. This is a great way to use up turnips and sweet potatoes. I don't especially enjoy turnips when they're in chunks, but presented this way they're just pleasantly earthy. Maybe some barley would be good. Barley is good with pretty much everything.

In which our dear narrator becomes too busy to blog

Yes, fall semester is upon us, folks.

These days I am usually too busy to write a whole blog post, so when I'm browsing around and find something interesting, I'll usually just del.icio.us it.

Since you're obviously obsessed with me and the things I find interesting (all 3 of you who read this), go ahead and subscribe to my del.icio.us RSS feed.

For my dad and other analog people: del.icio.us is like the "Bookmarks" thing in your web browser. Except instead of storing the bookmarks on my computer, they're stored in the cloud, so anyone can access them anytime. Well, most of them. Handy if I need to find something I bookmarked 3 months ago when I'm not at my own computer. Like if I'm in the library, where I spend all of my time, studying so hard it hurts my soul.

On Alignment and Alignment Tooling

From Richard Sachs via this post (edited for clarity):
The fixture, once set up, is the part that holds all the mitered tubes.
A full front triangle is assembled, fluxed, and pinned.
I tack the bands on the head lugs, and the sometimes the points of the top and down tube lugs. (it depends on the fits).
I remove this ass'y and transfer it to the alignment table and use tube standards to keep the frame's own weight from skewing a reading.
I tack the seat tube/bb are in alignment.
I ensure the the head tube is "straight" using an M+L (Marchetti tool that extends a steering axis reading over a meter's length.

Then - i free braze all of this, because at this junction, the only errors
Are from my inattention rather than the tools. once the front triangle is brazed.
The flux washed, and the head tube reamed, i use the alignment table to see how close i came.
As jon wrote/suggested, the frames i keep are the ones that meet my alignment standards.
The ones that don't, get tossed.
I toss 3-4 a year on average.
e-RICHIE©™®
from Andy Stewart via this post:
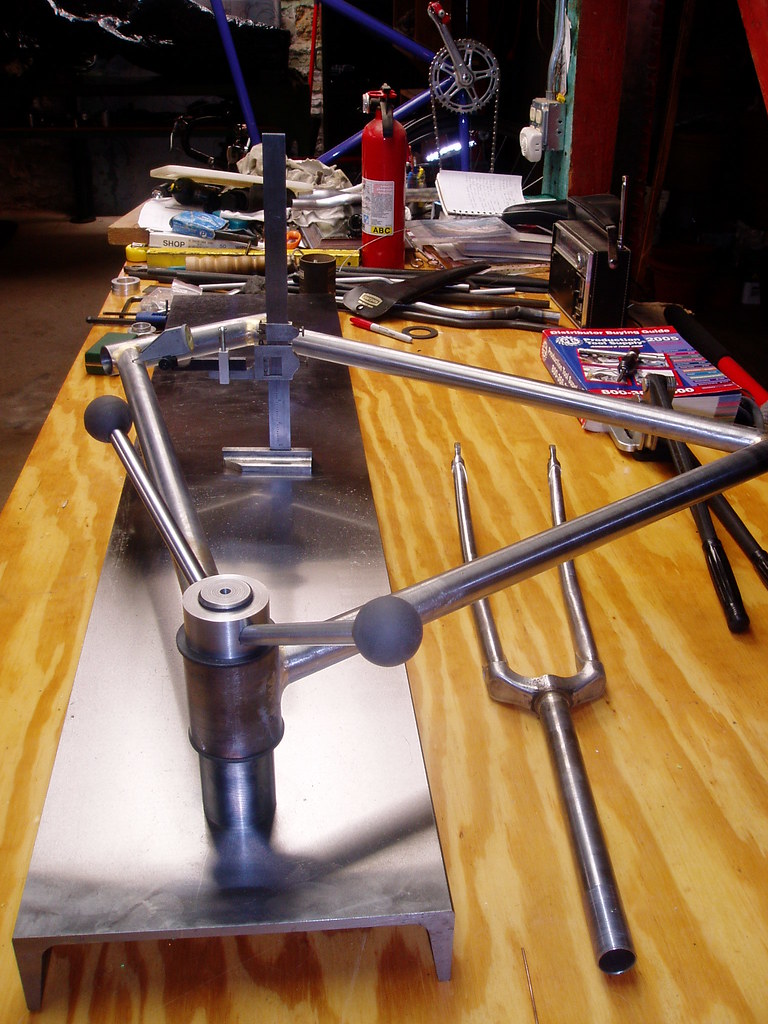
When I first got it I did very basic frame positioning for alignment. Simple "C" clamped the BB to the surface and used a Vernier caliper as a height gauge to measure up to the tubes. As time, imagination and $ allowed I've added a proper BB post, solid measuring tools, dial gauge and recently a fork vice/block for the surface. Each has made working with the surface easier and quicker. My time to build is hard to get these days so being able to take a pinned and tacked main triangle, align it and finish braze it quickly is nice. My BB post is a home designed thing. Steel, hardened and ground. Simple machine bolts and stepped washer are the clamp. Small machine
screw jacks act as the risers for tube support during bending. Various bars act as levers. Home made head tube cones for the alignment bar.
Photos of Andy's setup from my visit to his shop are on my Flickr

From Doug Fattic via this post:
One thing to remember if one is using V blocks on a flat surface to hold tubes is that the height difference between their flat bottom is not the same as the contact points of the V in the block. In other words, you can't raise the bottom of top tube (when it is a 1" tube) V block 1/16" (1/2 the diameter so the tube's centerlines agree) higher than a seat tube V block for a 1 1/8" tube. If memory serves me correctly it is .088" per 1/16" of diameter difference. I've got the formula somewhere if someone wants it.
This should be the height difference (.088") of the shim below a V block holding a 1" tube and a V block holding a 1 1/8" tube. Engineering students will already know this but my undergraduate and graduate studies were in the behavioral sciences (psychology, counseling) so it had to be explained to me.
--
A fancy Italian-made alignment tool plus detail

Alex Wetmore has some sweet alignment tools he made in his basement
, especially these dummy headset bits that hold a 7/8" cheater bar

--

From Cory Swartz
I've made a few different BB posts recently, for different things. 68mm was the intended shell, but 70, 73, anything w/ that same OD/ID would work.
Tandems, EBB, BMX would require some additional pcs that I haven't worked out just yet.
Used 2" round stock, 1018 CRS. Maybe not the fanciest but it is quite economic and very readily available.
I made the diameter to fit inside the bb 1.325" if I remember correctly, nice and snug but not too tight to bugger the threads.
Basically just split the 68mm width in half w/ about an extra .030" or so clearance between the two pcs in case you come across a shell that's a little undersized in width. That's how I got that length, and the bottom surface of the shell to the top of the plate at 100mm seems to be pretty popular.
I think I made the top "cap"(?) @ 1" thick, 3/4" maybe, I forget....
Tapped a 3/8" hole in the center of the bottom and clearance and c/bore for the 3/8 SHCS in the top to hold 'em together.
The bottom of the bottom would be tapped whatever you want. 5/8 or 3/4 or even 1" would be my pick if the bolt holding it to the table is really long.
The one I did for Owen [Lloyd] a while back I think was 3/8, but then he had some other mounting considerations involved.

This is the one I made for Owen [Lloyd], so he could mount to existing inserts in his surface table.

The other(taken apart) is one I made a year or so ago as a "first shot" playing w/ stuff, but you can get the idea...
--

From Alex Meade:


Alex says:
Pretty basic. Hunk of channel iron, which I was fortunate enough to be able to talk a friend into surface grinding for me. Post started out as 2" diam A2 tool steel (got it cheap on eBay), turned threads on both ends, a big nut holds it to the bottom of the channel iron. If I had it to do over again, I'd have turned the post to be a nice tight slip fit for Campy BB facing tool inserts. As it stands now, I usually have to loosen/tighten the top nut after a good tweak to the frame. One day maybe I'll make some inserts for it. Once I finished the post, I heat treated it to Rc 62 so the shoulder doesn't wear with repeated contact with BB shells. So far so good on that score. Top nut is aluminum.
--

Thanks to all who contributed.

Jamie Swan's piece in the Spring 2006 issue (Vol. 4, No. 3) of Vintage Bicycle Quarterly is required reading on the subject of frame alignment.

On tube bending

A local company is trying to bend some 3/4" 4130 tubing to use as stays on BMX frames. I hope to help them make this happen.

I did a little research on this and found this page about bending tubing for recumbents:
http://www.ihpva.org/people/tstrike/building/tubebend.htm

Apparently, bends become difficult or impossible when
( tube diameter / wall thickness )
exceeds 20 : 1.

The .75" x .035" wall tube they've been experimenting with has a ratio of 21.4 : 1, which has led to serious crinkling.

So I will recommend either decreasing tube diameter, like to 5/8":
5/8" (.625") x .035" wall = 17.9 : 1

or, better yet, increasing wall thickness, like to .049":
.75" x .049" wall = 15.3 : 1

Of course, changing this tube spec will affect the frame design. Larger-diameter, thinner-walled tubing is generally stiffer (up to a point) than smaller-diameter, thicker-walled tubing.

Furthermore, bends become difficult or impossible when
( bending diameter / tubing diameter )
is below 8 : 1.

Hence .75" tubing ought to be bent on at least a 3" radius mandrel, which is pretty reasonable. A fork blade bent around a 6" radius is considered "tight".

And of course, the bending rig should accommodate the tubing as described in the link above: good rigidity, mandrels shaped to fit the tube closely, etc.

Consumers Are Consuming Raw Materials

Then in the middle of a "Manufacturing Processes" lecture, the prof said something about how, as opposed to manufacturers, consumers don't consume raw materials.

I perked right up. I'm a consumer, I thought to myself, and I consume raw materials all the time.

Moreover, the resurgence of craft in the US* has redefined what it means to be a consumer.

*
cf. MAKE magazine, steampunk, TechShop & The Crucible, hobbyist/amateur frame builders, this WIRED article mentioned previously, and even The Whole Earth Catalog

These "crafters 2.0" are consuming raw and semi-raw materials (as well as scrap materials, even better). They're a different kind of consumer.

It's a niche, but thanks to The Long Tail, it's a valuable niche.

--

This way of consuming smacks of a bygone age, when a family used what nature provided to produce what they needed to survive.

The settlers who populated the American frontier didn't head to Wal-Mart to stock the wagon on their way out of town. There was no all-inclusive, Chinese-made, Frontier-Settling Kit.

They processed the raw resources around them, and they used those resources completely, wasting little.

They manufactured on-site a lot of what they needed: a house, a plow, leather goods, clothing, food. Manufactured goods were expensive before mass production, so it was cheaper to make rather than buy.

Perhaps I'm being sentimental.

But I wonder what can be learned from these frontier ancestors. The best of them were tough, innovative, self-sufficient, and hard-working.

Rant/Rave: Online TV ads

CAUTION
CAFFEINE-FUELED RAMBLING
NEXT 10 MILES


I've been watching the TV series Lost via abc.com (highly recommended, but addictive). They have these online ads in between acts of the show. One of them if for Discover card and goes something like this:

"We're a nation of consumers... And there's nothing wrong with that..."

And then it goes on about how we should all get Discover cards so we can be better consumers, manage our debt better, etc.

The thing is...there's a lot wrong with that.

--

Also, seriously, people, if you're going to pay for ad time on an online TV show, have the decency not to run the same annoying ad over and over. It makes me hate you.

I'm looking at you, Pfizer, with your fybromyalgia medicines. And you, Blackberry, with your catchy but repetitive jingle-video.

The best ad series, which rarely comes on, was from Epson. They were 30-second spots interspersed throughout the episode, each different but all showing a couple talking about printers in a funny way.

This was great. This made me like Epson. Please be like Epson, everybody.

How to be an Academic in Five Easy Steps

1. At every opportunity, impress upon others the importance and relevance of your field of study. All other fields are inferior.

2. Remember that your field is connected to everything. It is a lens through which everything is to be viewed. Continuously look for ways in which you can connect your field to disparate events and ideas. (The conflict in Georgia? Caused by poor financial planning. Or a grave ethical problem. Whatever you're studying.)

3. Emphasize that your field is infinitely complex and far beyond the grasp of the average person. Practice saying this in the most condescending way possible: "I'd love to explain XYZ Theory, but the differential equations are a little over your head...I better not get into it."

4. Obviously, a PhD is necessary to even begin to understand. After all, if any schmuck could learn this stuff in a few minutes, then your PhD would be useless.

5. "It depends..." is the best answer to every question. The good academics stopped really answering questions many years ago.

The Home Stretch

We're gonna go ahead and turn on the seatbelt sign for a few minutes, folks. Looks like we're in personal blog mode for a while.
Today begins my senior year of college. I plan to have a real-life college degree in about 9 months.

These last two semesters will hopefully be filled with the most interesting work I've ever done.

I have been thinking about the idea of studying technology lately. I have been reading a lot of old books in the short break between summer and fall. Workbenches, Chinese blast furnaces, blacksmithing. There's so much cool old stuff out there. It makes the cool new stuff somehow even cooler. It also has given me a renewed appreciation for how hard things were for so long, like when I read about how a log cabin is built.*

This seems so important right now--to study the history of technology, and by extension the people & societies that created it. I am feeling more kinship with my more-traditionally-academic friends, who are pursuing Masters' in Biology, Sociology, and the like. I am not studying people in groups; I am studying technology, and that suits me.

At the same time, I'm still feeling the pull towards the shop. Any shop, at this point. The good news is that I got a call tonight informing me of a job that may be available for the semester in a machine shop on campus.

* It takes an enormous amount of work, but it's hard to summarize beyond that.

Blacksmithing classes in Charlottesville, VA

...apparently for college credit:

Virginia Institute of Blacksmithing
Piedmont Virginia Community College is holding classes in blacksmithing through the Virginia Institute of Blacksmithing Studios. Visit them online to see the schedule and request a catalog.
Checking the PVCC website, it looks like 1.4 credits for a weekend "Beginning Blacksmithing" course.

These appear to be offered four weekends this fall. I've got them in my academic calendar on Google Calendar:

From "The Whole Earth Epilog": Books of Interest

Seeds, Spades, Hearths, and Herds by Carl O. Sauer
Planning for an Individual Water System, Am. Assoc. for Vocational Instructional Mat'ls
AAVIM has many others lised, including:
Selecting and Storing Fuels and Lubricants
Small Engines, Vols. I and II
Ball & Roller Bearings

Practical Farm Buildings, James S. Boyd
Good Food Naturally, John B. Harrison
The Apartment Gardener, Florence and Stanley Dworkin
Raise Vegetables Without a Garden, George and Katy Abraham
Shelter, Shelter pubs.
Architecture for the Poor, Hassan Fathy
Shelter in Africa, Paul Oliver
Master Builders of the Middle Ages, David Jacobs
The Elements of Structure, W. Morgan

Craftsmen of Necessity, Christofer and Charlotte Williams
Country Craft Tools, Percy W. Blandford
China at Work, Rudolf P. Hommel
The Sensuous Gadgeteer, Bill Abler
Making Do, Arthur M. Hill
The Foxfire Book, Eliot Wigginton
Crafts of the North American Indian, Richard C. Schneider
The Making of Tools, Alexander G. Weygers
Mountain People, Mountain Crafts; Elinor Lander Horwitz

Living Poor with Style, Ernest Callenbach
Climate Control for Low Income Housing
Putting Food By, Ruth Hertzberg, B. Vaughn, J. Greene
How to Cook and Eat in Chinese, Buwei Yang Chao
Good Cheap Food, Mirian Ungerer

Some Men are More Perfect Than Others, Merle Shain

Science and Civilization in China

Riding the Rails, Michael Mathers
The People's Guide to Mexico, Carl Franz
The Tool Book: A Peoples Car Repair Manual
The Complete Motorcycle Nomad, Roger Lovin
Roll Your Own, Pallidini & Dubin

Diet for a Small Planet, Lappé
Handmade, Langsner
600 More Things to Make, Cook and Phipps

More on Green Industry

I have expanded upon the earlier paper on green manufacturing, which was itself an introduction to a larger group project on that subject.

The topic now includes many other industrial sectors, so I renamed it accordingly.

The assignment was to write a well-researched paper on a subject of my choosing. I wrote it as a broad overview of the subject, like a white paper or a report for someone who wanted the "view from 10,000 ft."

Let's try this in Google Docs format, since there's a lot of footnotes and such:

Green Industry: A Contradiction
by Ethan Labowitz

On Making Pasta

I cook pasta rarely, because I try to limit the amount of starch I eat.

I cook pasta like I braze (or rather like I try to braze). Get it hot, get it done, and get out. Don't cook it any longer than necessary.

Salt the water before you even start it boiling. Use plenty of coarse salt. Helps it boil faster. [Maybe. See below.]

Taste the pasta while it's cooking. I do this about three times. Ignore the clock and timer. Take into account that you want it have a little bite when you eat it, and that it will keep cooking a little after you drain it. You want pasta to be about medium-rare when you eat it, so cook it to rare.

Drain the pasta well when you're done, and do it quickly. You want all that hot water out of there so it cools down and stops cooking ASAP. Shaking the colander can help.

Coat the pasta with a little olive oil when it's still in the colander. Keeps it from sticking. Use a light olive oil of the finest quality you can get. Imported from Spain or Italy and Extra virgin for sure. First cold press if possible.

Use the right materials. Good, fresh pasta is great, though usually too rich for my budget. Good olive oil is relatively cheap, and necessary for so many other things. Salt in the water is essential. Likewise a good pot of the right size, depending on how much is being cooked. And plenty of water.

Bad pasta was cooked in too small a pan, with too little water, for too long, then sat in the waer for a few minutes before it was drained, and not coated in oil afterward. It tastes so bad. It tastes like the worst airline food on the worst airline.

Brain Dump: Summertime Nocturnal Edition

...With the Richmond Weather Terror Alert Level at Orange (((Dangerously Muggy))), and only evening classes remaining in the summer schedule, our subject has entered a nocturnal period, characterized by sleeping during the day and working at night...
Current projects:

- Getting Windows running on my Mac with vmWare Fusion...

- ...So I can use free AutoCAD and Inventor software to finish drafting class projects:
  1. A 3D rendering of an office
  2. An animated, exploded 3D model of a Bringheli fork jig (YouTube upload soon)
- Finishing the recent move into a new Fan District apartment: plenty of around-the house installation/repair/fabrication work. The filthy basement is being made over as a shop. Slowly. Pics to come.

- Continuing a haphazard review of books found in the Whole Earth Catalog. Recommended so far:
Colonial Living and Frontier Living
by Edwin Tunis
Thorough, interesting, plainly-written surveys of everyday life and industry in other times. The author really knows this stuff. He has a unique sense of humor that comes through every few pages.

Jigs and Fixtures for Limited Production
by Harold Sedlik
A thin book written with an Orwellian sense of economy and brevity. I sense the intended reader is a tool engineer at a large American factory in the 60s, but the information is valuable to other uses, even around the house.

Human Engineering Guide for Equipment Designers
by W E Woodson and D W Conover
Your tax dollars at work. There is an astonishing amount of useful data in here for anyone who wants to make something that people will use. Some pure data about people; some recommendations from experience. Somebody had to go to a lot of effort to collect all this information. Geared toward NASA and the military but applicable elsewhere.
Bicycle related: There are body dimension charts on pages 5-17 and 5-19 that one could use in comparing dimensions for frame fit.

- Creating a presentation on green manufacturing for a class on workplace communication. This is done actually, but now I need to find a way to port the .ppt into a web-friendly format.

The Whole Earth Catalog


From the Whole Earth website:
[T]he Whole Earth Catalog [was] first published in 1968 by Stewart Brand. The Catalog found immediate success with the youth movement, selling millions of copies and quickly becoming the unofficial handbook of the counter-culture. It won the National Book Award, cited by jurors as a "Space Age Walden", hitting national bestseller lists in the process.
From Wikipedia:
The Whole Earth Catalog was a sizable catalog published twice a year from 1968 to 1972, and occasionally thereafter, until 1998. Its purpose was to provide education and "access to tools" so a reader could "find his own inspiration, shape his own environment, and share his adventure with whoever is interested." Apple Inc. founder and entrepreneur Steve Jobs has described the Catalog as a conceptual forerunner of Web search engines.
I think I first became interested in the Catalog through Kevin Kelly's bio.

Copies of the Catalog appear to be rather expensive. Alibris has one for $70, and more for $110+.

The books reviewed within it, on the other hand, seem to be relatively easy to get. There's a note in the inside front cover urging readers to be patient, because business that sell products listed in the Catalog often have trouble filling all the orders they received after it's published.

My theory is that people tend to want to keep their Whole Earth Catalog, because of its symbolic significance. The books reviewed within, on the other hand, had to be printed in great quantities to meet demand, so there a lot of copies out there, with fewer owners being quite as attached to them.

Anyway, I jotted down a few interesting, relevant book titles:

Jigs & Fixtures for Limited Production by Harold Sedlik
Human Engineering Design for Equipment Designers by Wesley E. Woodson and Donald W. Conover
Introduction to Engineering Design by T. Woodson

These are all either available through my local library, inter library loan, and/or for a few dollars via used book websites like Alibris or Amazon.

The other book I found recently, which if it was never in WEC, should have been:

Facility Design by Stephen Konz

Technical Education for a Younger Set

I've blogged a lot previously on technical education, focusing largely on my own age demographic. I'm 23, so the discussion has generally centered on undergraduate and post-graduate studies.

But, really, I started learning about this stuff at a very young age. This included *a lot* of time building stuff out of LEGOs (especially TECHNIC) and taking every electronic device I found around the house. Didn't you?

So what about technical education for small children? Should we be letting little kids get hands-on with fire, knives, cars, power tools, and other implements of de-/construction? How do we do that? Shouldn't we be worried about them cutting/maiming/burning/killing themselves?

Gever Tulley tackles these issues in a great 9-minute talk called Five Dangerous Things You Should Let your Kids Do. Tulley founded The Tinkering School, a "summer program which aims to help kids builds the things they think of."

Tinkering School photos via Tulley's Flickr.

Found via the superb AIDG blog

Improvised Tools from Africa

Here's a wonderful nexus of framebuilding and Appropriate Tech:

As reported at Afrigadget,
framebuilder-turned-bike-brand-captain Tom Ritchey
sent photos of hand-made tools from bike shops in Rwanda to
WIRED magazine co-founder, Whole Earth Catalog editor, and blogger extraordinaire Kevin Kelly

See the pictures here, via KK's interesting Street Use blog

KK also edits/complies the wonderful Cool Tools blog, a personal favorite. Every day there's a new tool review sent in by a satisfied user. Usually the things are relatively cheap.

Rethinking Occupational Taxonomies

Back when I wanted to be an aerospace engineer, I did some research and came away with the following understanding of how things worked:

1. Scientists do the theoretical stuff.
2. Engineers design stuff, solve problems, and apply the scientists' theory.
3. Technicians install/build/make what the engineers designed.

A semester of engineering school made it abundantly clear I was not destined to be an engineer. So I've been trying to decide ever since...Where do I fit in this hierarchy?

Now I have realized some key truths:

1. Engineers, bless their hearts, often lack on-the-shop-floor experience, which can cause problems in the design process.
2. There are actually more than three positions in that 1-2-3 hierarchy.
3. Especially under sub-optimal conditions, the lines between Engineer and Technician are often blurred.
4. People who are good at their thing often have a lot of knowledge that overlaps with the areas around them--e.g. good engineers know a lot about technicians' jobs.

Henderson, North Carolina

welcomes me.

Oh, Internets...how are you surviving without me?

College Visit: Appalachian State University

I am in Boone, North Carolina, today to visit Appalachian State University, and particularly their Appropriate Technology department.

I'm scheduled to visit a renewable energy class, meet with the professor afterward, then meet with an admissions person.

In the afternoon I'm headed to Raleigh for a visit with Andrew Stewart from the [Frame] list. Photos to come.

Having done a few of these college visits as a prospective transfer student (RISD, VCU, John Tyler Community College, Hampshire), some guidelines have emerged:
- Ignore the official tour and information session. These tend to be filled with general info on the whole school (easily found elsewhere), and are usually geared toward high schoolers and their parents. They also consume valuable time that could be spent getting a more hands-on look.
- Get a map of campus ahead of time. Figure out the basic lay of the land so you know how to wander around. Find the dining hall, admissions, the student commons, the relevant academic buildings, and whatever else interests you.
- Spend your time with professors and students. These are the people you'll potentially be working with. They know the real deal, and they'll tell you, if you play your cards right.
- Set up a meeting with at least one important professor. Sit in on an interesting class if possible. Do this with plenty of advance notice.
- Get a good look at the facilities and the shops. These say a lot about the priorities of the school, the department, and the professors.
- As my sister says, the most important question is: "What are your graduates doing now?".
- Eat at a place you'd likely eat at as a student. Ditto coffee and beer.
- Buy a t-shirt. And a postcard.
- Send thank-you notes to the people who helped you. Better yet, send them something small that they seem to need.
- Come across as eager, enthusiastic, driven, and all that, but don't over-do it. Make an impression. Be memorable. This isn't hard--not many prospective students do this kind of visit. I am finding that 90% of success in academia (anything?) is due to good name recognition (a.k.a. networking).
- Even if this school won't work out, you can still learn a lot during your visit. These professors probably know their counterparts elsewhere. They definitely know the big names in their field. And they probably like helping enthusiastic students.

Bike Pron of the Day

A seatstay crown from sabrosa cycles

Green Manufacturing

***What follows is the introduction I wrote to a group paper for Production/Operations Management class.***

There is a fundamental contradiction in the phrase “green manufacturing”. The process of making nearly anything will, by necessity, consume resources and produce waste:

(1)

Buying the results of these processes, Americans have been consuming resources at an unsustainable rate in a breathless quest for increased quality of life.(2) The US population increased threefold from 1900 and 1995, while total materials use increased tenfold.(3)

(4)


Thus our industrial future will conform to one of three basic scenarios. Commerce and industry could continue operating as they have, driven largely by economic growth and consumer demand. Or we could transition to a “green world”, where sustainability and environmental impact become major factors in design, manufacture, and use of products. Or we could enter a “brown world”, where concerns like sustainability are grossly superseded by interests such as short-term economic gain and consumer convenience. Which of these scenarios becomes our reality is largely a function of choosing how we use technology, not the rate of technological change or economic growth.(5)

The process of making manufacturing “greener” is often perceived to happen only at significant economic cost. This may be the case when an “end-of-pipe” solution is used, like a treatment device added to the end of a smokestack or sewer pipe.(6) But when process and product are examined with an eye toward reducing waste, the results often include increased productivity.

Reasonably successful businesses may be understandably reluctant to implement such changes, since potential risks of failure may seem to outweigh immediate profit gains. In this way, “green” manufacturing is a lot like Lean manufacturing, or most any other system of process improvement. There are up-front costs, but these can pay dividends for years to come.(7) In green manufacturing, there is an added benefit in making the whole economy more sustainable, thereby further ensuring future profits.

1 Thomas Graedel and Jennifer Howard-Grenville, Greening the Industrial Facility: Perspectives, Approaches, and Tools (New York: Springer, 2005) 6
2 Ibid 13, 15
3 Ibid 15
4 Ibid 16
5 Ibid 10
6 Curtis Moore and Alan Miller, Green Gold: Japan, Germany, the United States, and the Race for Environmental Technology (Boston: Beacon, 1994) 2
7 Ibid 4

3D Brake Pivot Jig Mk 2

*** Anyone wondering what the hell this is all about should go back one post***

Another night, another brake pivot jig. I'm getting better with Inventor; I made all this from scratch in less than 2.5 hours, and even worked on some actual schoolwork during that time.

• Distance between pivots is adjustable from 2.25" to 3.5" IIRC...2.5" is stock width for Dia-Compe centerpulls.
• All indexing slots are 1/4". All hardware is M6, colored gold for jig bling. The brake pivots are included now, colored gray.
• The Backbone Bar is now 1/2" x 3/4" steel. It's 15" long in this rendering, but that's subject to change.
• This design is more complicated and requires more milling, but it was designed to solve a few problems inherent in the last one. Those problems are described here and here.
• I am thinking of using steel for everything, but alu could be used judiciously.
• As drawn, this can be made from the following:
- about 18" of 1/2" x 3/4", in two pieces
- enough 3/4" round for the dummy axle(s)
- a few inches of 3/4" square
(plus a few inches of 1/2" round for the brake pivots)
• I think it's possible to make revisions such that 3/4" round and 1/2" x 3/4" are the only required sizes for the jig itself.

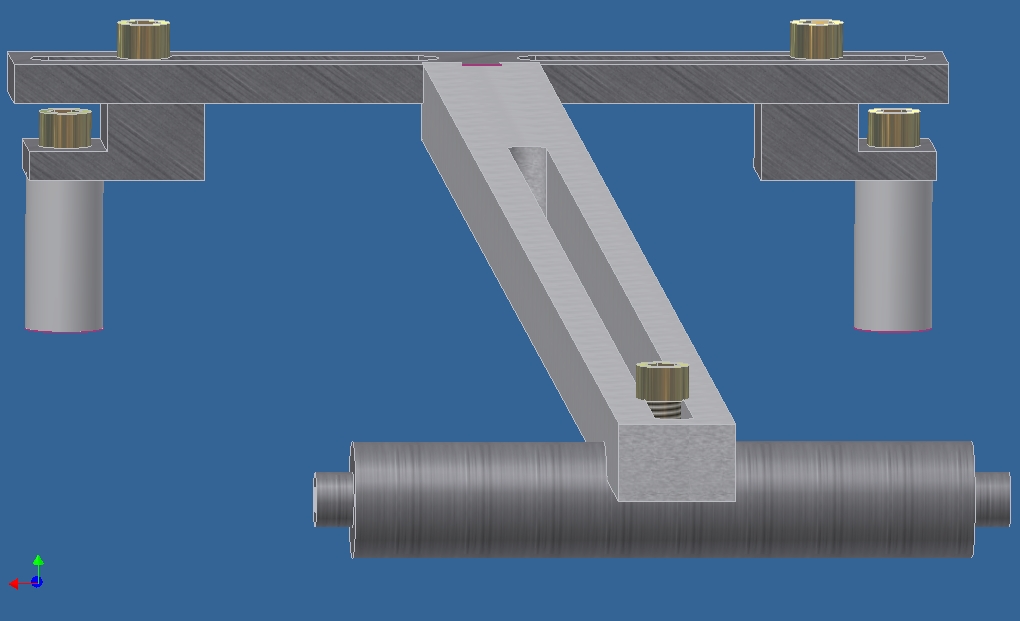
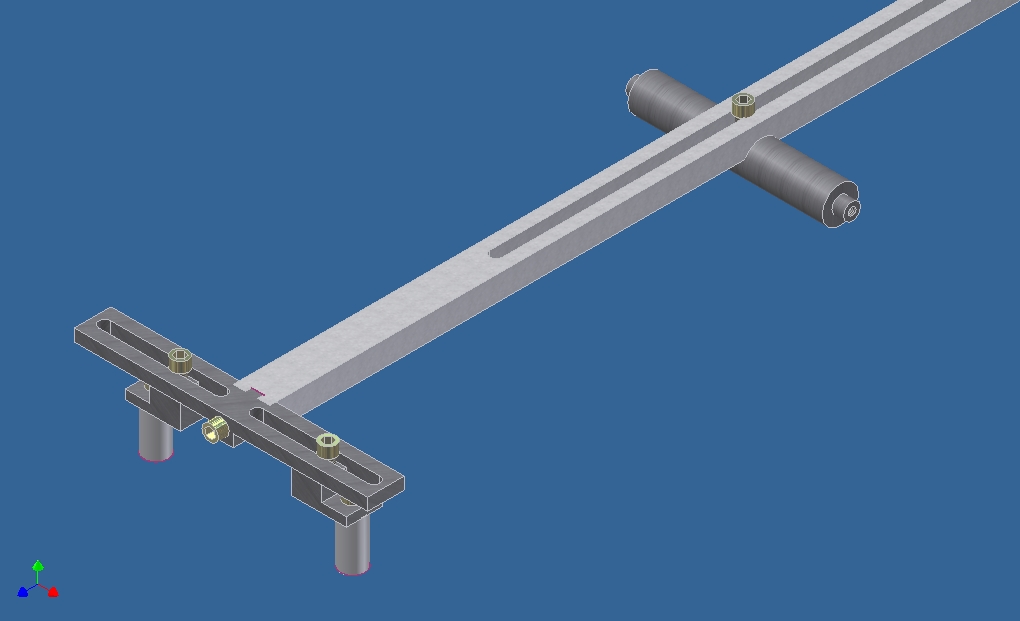
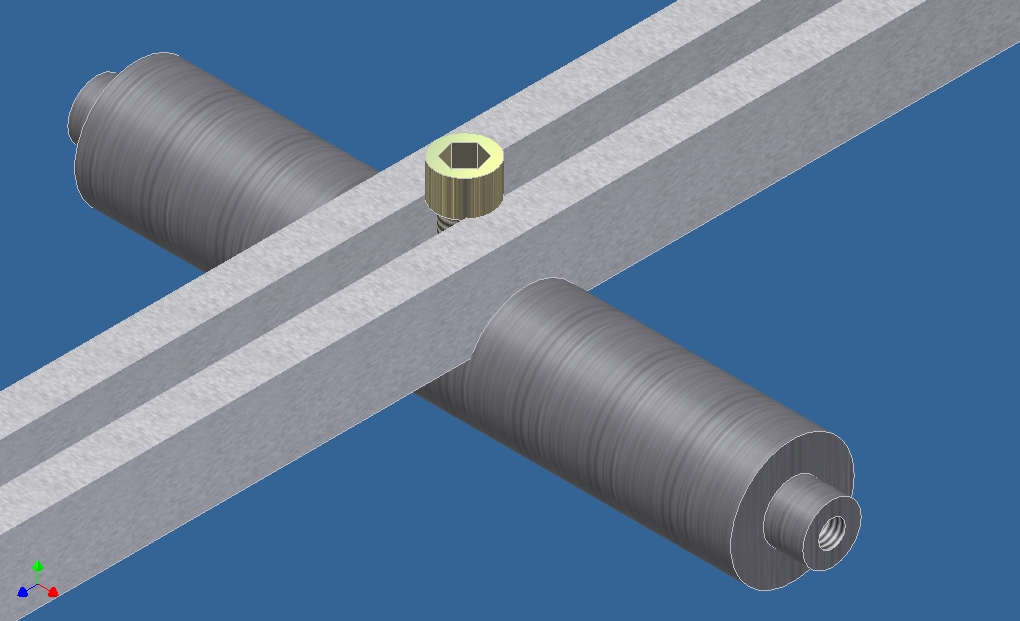
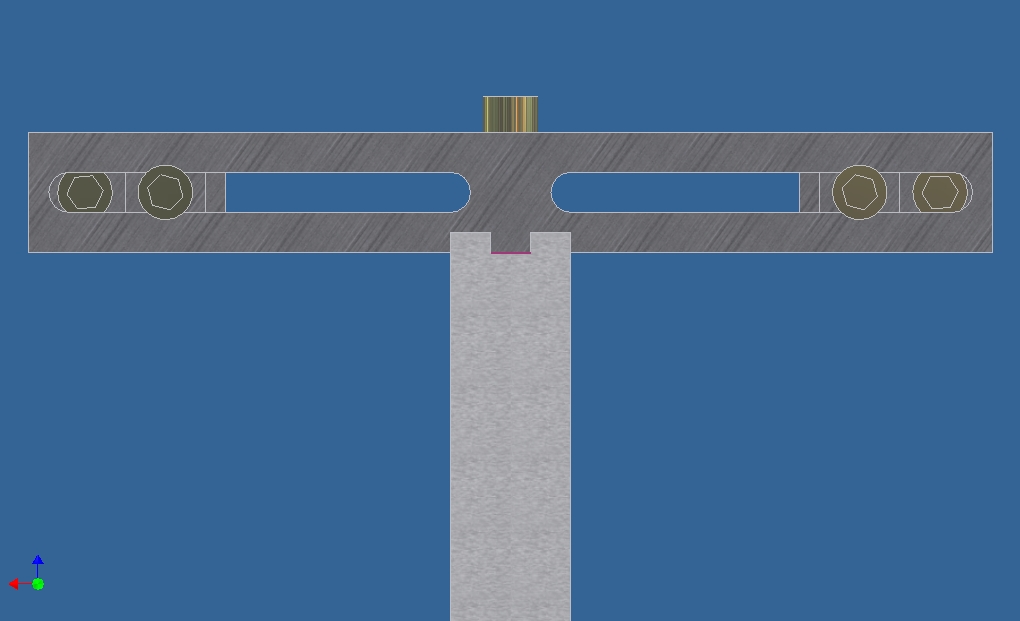
Assembly top view. Dropouts go on the left side.


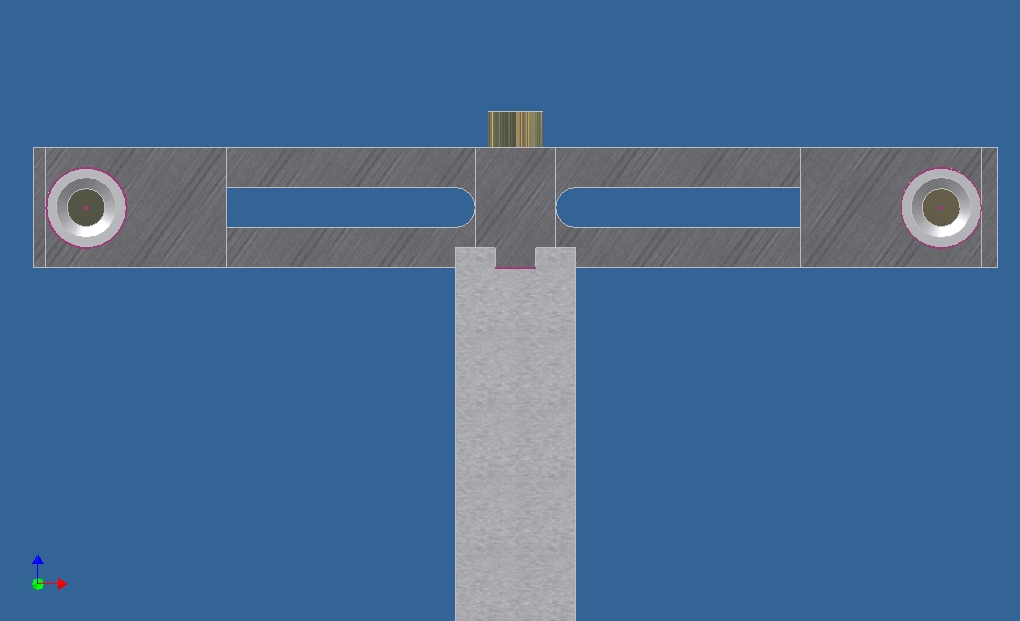
"Crotch shot" looking up from the bottom of the fork.


Isometric view from top right of fork.


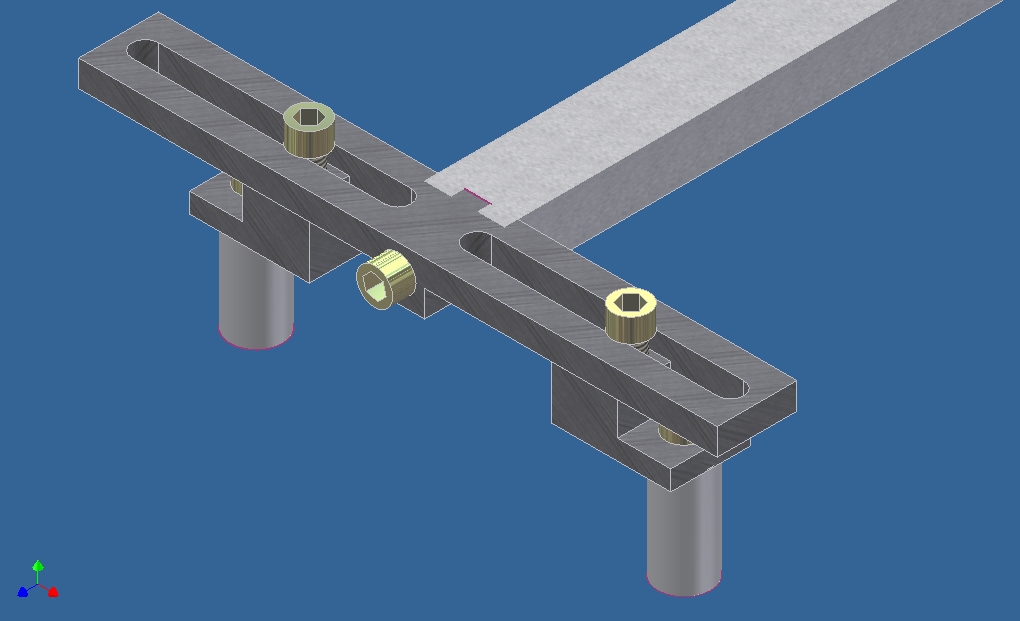
Isometric detail view. The pivots aren't symmetric, and it's bothering me a little, but I had to upload in a hurry.

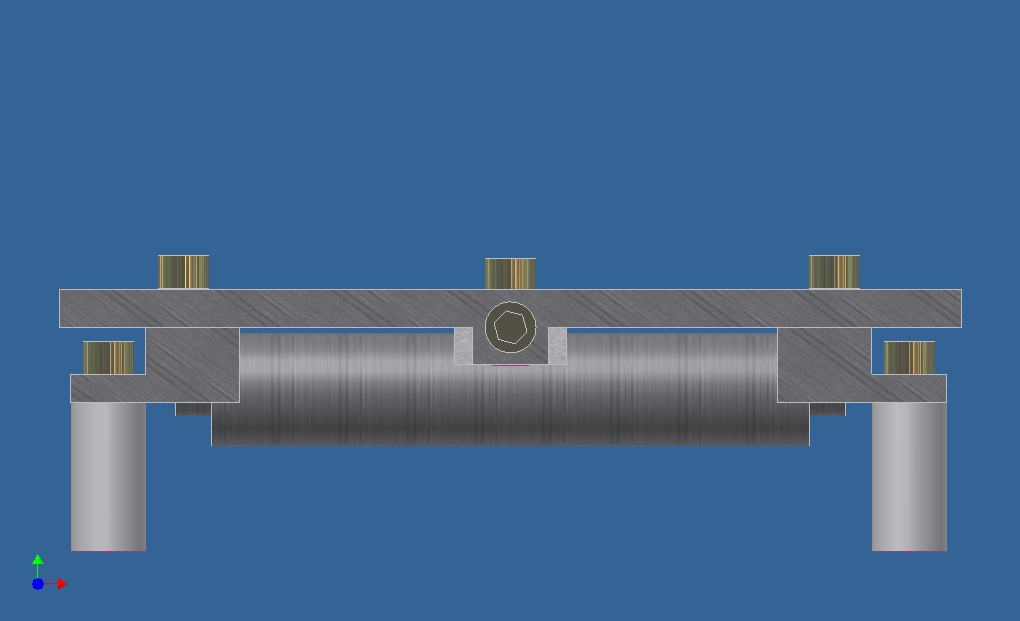
Assembly side view.


Isometric dummy axle view. It has two 1/4" wide slots milled into it, then drilled/tapped M6. This would (I'm pretty sure) be compatible with Bringheli jigs.


Top view detail.


Bottom view detail. You can see that the brake pivots are hollow, and showing the gold-colored M6 bolts that holds each of them to the mating piece.


View looking down steerer tube.

Modelling the Brake Pivot Jig

I am slowly learning some 3D parametric solid modelling with AutoDesk Inventor. As a first project, I have modeled the brake pivot jig I described a while back.

These drawings are pretty close to what I drew in that earlier post, although not all of the parts exist yet. A computer model conveys the concept better than the existing parts could.

These drawings are missing the brake pivots themselves, as well as all the metric set screws, clamping bolts, washers, etc.

Also conspicuously missing is the fork, which would provide context. Here's the best I can do. This is the jig that inspired this new design:


Now the model of the new jig...

Isometric view from dropout end. This is common fork jig positioning (e.g. Anvil, Bringheli).


Similar view, but flipped over--this would be showing the fork's back/underside.


Isometric view of Dummy Axle, Dummy Axle Holder Block, and Backbone Bar.

The dummy axle design is inspired directly by Anvil. The mating Block should be compatible, should I decide to upgrade.

Isometric view of Pivot Holder Block, Pivot Holder, and Backbone Bar.
Lower set screw hole is mirrored on the far side, as can be seen in other views.
These two set screws (only one is necessary at a time) hold the Pivot Holder at the proper 90° angle. I also hope the threaded holes can be used to hold chainstay and seatstay bridges in position for brazing, using a pre-brazed fender mounting boss.


Assembly side view. Distance between blocks is infinitely adjustable.


Looking down through the fork's steerer tube. This would be what the rider would see if a whole host of unlikely things happened (jig in place of front wheel, transparent frameset).


Weird pseudo-end view, looking up the fork from the dropout/bottom end.


So, what do you think?

Back from the Cirque

Le Cirque was le oven, but the bikes were sweet and I met a bunch of cool people.

The only substantial food for sale was, inexplicably, German. And delicious.

Photos soon...plenty of time tomorrow to edit 346 photos.

A certain Mr. Sachs sold me a copy of his DVD, which I'll eventually review. Stay tuned.

Le Cirque du Cyclisme

As Chris K mentioned, this year's Cirque du Cyclisme is being held June 6-8 in Leesburg, VA, only a couple hours' drive from here.

This promises to be the vintage bike event of the year...which sounds either really awesome (as it does to you and I) or infinitely dull (as it does to my family).

Alas, I can only afford to attend Sunday's swap meet. Extensive framebuilding coverage is planned.

I look forward to meeting/worshiping/chatting with:

Andy Stewart
Peter Weigle
Daves Wages of Ellis Cycles
Richard Sachs
Chris K of Velo Orange
Scott Clark from the i-BOB email list
Jamie Swan of Centerport Cycles
Drew Guldalian of Wissahickon Cyclery (retail bike shop) and Engin Cycles (frame shop)
Charles Lathe of Coho Bicycles
Elton Pope-Lance of Harris Cyclery
Joseph Ahearne of Ahearne Cycles
Mitch Pryor of MAP Cycles
Brian Baylis
Matt Klucha of MSH1
Mark Nobilette
Mauricio Rebolledo
The Bilenky Cycle Works gang
Joe Bringheli
Johnny Coast

[Update: expanded to include this list]

Who am I missing?

Hampshire/Lemelson Update

I have it on good authority that funding for Hampshire College's Lemelson Center will likely decrease next year, meaning fewer courses will be offered. This is unfortunate given the potential that exists there.

Moreover, the framebuilding course is one of the more expensive and is thus more likely to be cut. Sad news.

Hampshire College and a Maasai Rap Video

Earlier this spring I spent a day visiting Hampshire College (wiki), a small liberal arts college in Amherst, MA.

Hampshire is an interesting place, because every student designs their own degree program. There are foundation courses in the first year, then two years of study in an area of the student's choosing. Finally, in the third year, the student completes a big self-directed project, somewhat like a graduate thesis. Also, there's no grades, just student evaluations.

Yes, they do play a lot of frisbee.

But the most interesting thing there is the Lemelson Center for Design, part of their School for Interdisciplinary Arts. The Center is funded mostly by grants from the Lemelson Foundation, named for prolific inventor Jerome Lemelson.

The Center has great facilities, especially for metalworking, and especially for framebuilding and other bike-related work. The shop is unusually clean and well-organized, with lots of funky, shop-made tools. They have an Anvil Journeyman frame jig as well as a full set of reaming/tapping/facing tools. A course on bike frame construction is taught every fall. They are especially geared toward technological solutions for disabled people. Here's some student projects:


--

While observing the "Appropriate Technology in the Developing World" class, I saw some students brass brazing a bike cart based on the Community Bike Cart Design plans (by Aaron Wieler, a Hampshire grad). They were using Harris black flux, which actually seemed to work OK despite the high temperature, although I would've preferred Gasflux Type B blue flux.

So after returning to Richmond, I sent a few sticks of Gasflux C-04 and a little bottle of blue flux up to Hampshire. Today I got this email from the Appropriate Tech professor:
This morning I was searching online for a blue colored flux that I used several years ago and really liked. I couldn't find it. So it was really strange when I found your package outside my door several moments later, with a sample of blue flux, and instructions on where it was from. Are you a metal shop elf dressed up as a regular seeming guy?

The big story here is that I managed to seem like a regular guy.
But it also made my day to have helped the folks at the Lemelson Center.

--

The Lemelson Foundation also recently awarded a grant to KickStart, a non-profit that developed the MoneyMaker--a simple, affordable, effective pump for small-scale crop irrigation.

The MoneyMaker pumps were the focus of a fantastic 2002 Wired article, back when KickStart was called ApproTEC. That article made a big impact on your then-17-year-old narrator, because it was about practical ingenuity applied to problems in the developing world, and that kind of thing gets me all giddy.

But wait. It gets so much better. There now exists a rap video about the MoneyMaker (the pump, not a butt) by a Maasai rap artist named Mr. Ebbo, seen here very excited about something...possibly an irrigation pump:


--

The importance of a place like the Lemelson Center cannot be overemphasized.

It offers an entirely unique form of education. It breaks down traditional barriers between education in the arts, the business world, and the fab shop. Traditional educational structures tend to stifle this interdisciplinary learning, especially at the large universities that award most degrees (like mine).

It cultivates inventiveness. Moreover, it focuses inventive energy on the problems of groups that traditionally go overlooked: the disabled and the developing world.

From a business perspective, these markets may go untapped because at first the numbers look all wrong: the R&D and manufacturing costs appear too high relative to the size of the market. But the Lemelson Center can provide a vibrant think tank where good ideas can develop into marketable designs, and the Foundation can provide seed capital to get these designs distributed to the folks who need them, via a non-profit like KickStart. There are hundreds of similar problems waiting to be solved with a solution like the MoneyMaker.

This is one blogger who would hate to see a place as valuable as Lemelson disappear, even if I never study or work there.

Questions for Independent Study

What considerations go into selecting the following, and what systems exist to classify these things?
  • Greases (& lubricating oils, etc.)
  • Bearings
  • Metals
  • Filler rods (welding/brazing/soldering)
  • Fluxes
Sub-question: How did these systems come to be? How are they administered and updated? How and why have they evolved?

What considerations would one need to take into account in setting up a small-scale fabrication shop, especially in a less-developed area? What would be the ideal scenario?

Taking into considerations such as:
  • Ergonomic (lighting, sound)
  • Air quality and treatment
  • Personal Protective Equipment (PPE)
    • What PPE are necessary for what kinds of work? (specifically respirators)
  • Space
  • Location
  • Structural
  • Architectural & interior (e.g. paint, windows)
  • Electrical (1-phase vs. 3-phase, 220v vs. 110v)
How about I research these things over the course of the next year, in part by interviewing people and reading in the following disciplines:
  • mechanical engineering
  • production/operations management
  • architecture
  • industrial hygiene
  • ergonomics
Then I make a concise manual that tries to condense this academic/engineering knowledge into practical terms. Sort of a Machinery's Handbook for folks who find the actual Machinery's Handbook rather dry and over-involved.

Then I make this manual available for free over the Web, in a form that allows it to be improved upon by others.

Women and welding...again

Continuing the theme of women and welding...
The wonderful Sweetpea blog on welding stores.

Shop Class Journalism

In last month's WIRED magazine, Clive Thompson reminds us why shop class is important, especially for "my" generation.

--

Shop Class as Soulcraft
is the tentative title of a forthcoming book by Matthew B. Crawford.
In the article upon which it is based, published in The New Atlantis two years ago, Crawford brings together a lot of the themes I've been blogging about here for the past year.
[A]n engineering culture has developed in recent years in which the object is to “hide the works,” rendering the artifacts we use unintelligible to direct inspection. Lift the hood on some cars now (especially German ones), and the engine appears a bit like the shimmering, featureless obelisk that so enthralled the cavemen in the opening scene of the movie 2001: A Space Odyssey. Essentially, there is another hood under the hood. This creeping concealedness takes various forms. The fasteners holding small appliances together now often require esoteric screwdrivers not commonly available, apparently to prevent the curious or the angry from interrogating the innards. By way of contrast, older readers will recall that until recent decades, Sears catalogues included blown-up parts diagrams and conceptual schematics for all appliances and many other mechanical goods. It was simply taken for granted that such information would be demanded by the consumer.
This guy gets it!

Bonus points awarded because Crawford used to run a motorcycle shop here in Richmond, VA--and because he turned me on to local machine tool dealer Dempsey and Co.

While driving down I-95 today...

...I thought this:

"Design" and "fabrication" are not nearly as discrete as they are made to seem in college courses.

In real life, a design changes while a thing is being fabricated, and a good design is in turn based on fabrication experience.

Even tiny changes can affect materials in ways that can make a big difference. Sixty-eight degrees Fahrenheit is the universal standard for mechanical drawings. That is, a part should have the specified dimensions when it's at 68°. But most shops are closer to 72°, so the actual part will be slightly larger than the drawn one even when it's at room temperature. Then there's wood, which is also subject to temperature changes, and is affected by humidity as well.

So an effective design must take into account these kinds of intricacies, while integrating the perspective of the person doing the fabricating. A good example of how NOT to do this is to educate designers in all kinds of theoretical stress/strain analysis, but deprive them of hands-on fabrication experience.

Fabrication must take into account the intricacies of design, including the intended purpose and the necessary tolerances. Design must likewise take into account the intricacies of fabrication, first and foremost "What is it possible to make?", but also including "What design will allow the part to be made fastest?".

Isolating design from fabrication is akin to isolating thinking from speaking. Your thoughts change depending on what has already been said in a conversation. Your choice of your next words in turn depends on what thoughts have occurred to you. The two processes are happening essentially simultaneously; it's silly to try and ignore one or the other.

These blurry lines are the reason I cannot offer a one- or two-word answer to the oft-repeated question, "What are you studying?".

I'm studying all of this, both designing and fabbing. In part I'm still trying to figure out where the boundaries are: What is possible with today's technology? What is possible with just these three tools, one of which is dull?
And then there's: What's it sound like when an end mill is dull or bent? How do I choose a space in which to set up a shop? What kinds of lighting are best for this kind of work? What type of respirator should I use? How do I draw a part so someone else will understand how to make it on the other side of the world?

More cultural relevancy

They just don't make pinups like they used to...


courtesy of Lugged Steel

Brazing mentioned in an Oscar-winning film

from No Country for Old Men:

Carson Wells: [
Wells sits back and studies Moss] What do you do?
Llewelyn Moss: I'm retired.
Carson Wells: What did you do?
Llewelyn Moss: Welder.
Carson Wells: Acetylene? Mig? Tig?
Llewelyn Moss: Any of it. If it can be welded I can weld it.
Carson Wells: Cast iron?
Llewelyn Moss: Yeah.
Carson Wells: I don't mean braze.
Llewelyn Moss: I didn't say braze.
Carson Wells: Pot metal?
Llewelyn Moss: [annoyed] What did I say?

Bought a crank puller the other day

...so I figured I pop the cranks of the bike I've been riding and commuting on for most of three years. It's an 05 Bianchi San José with the stock cartridge BB.

The cranks were a giant pain to remove...took a cheater bar and a lot of yanking. Finally got them off and discovered that the BB is absolutely shot. Like it's difficult to move the spindle, and when it does move it's crunchy and indexed like hell.

The retaining cup (the plastic thingy in the non-drive-side) took a lot more yanking but also finally came loose. Then I attacked the BB cartridge itself, then with a cheater bar on the ratchet handle.

Flummoxed, I decided to soak the BB in anything I had on hand that was close to penetrating oil: hot sauce (saw it recommended on the BOB list), chain lube, and frame saver. I figure I can't damage the BB any further, and all this stuff should be pretty harmless to the steel frame.

--

Well, that saucy mixture didn't do much to loosen the BB, so I strapped the frame to my back and let the local bike shop take care of it. They didn't even charge me, and the guy who fixed it admired my newly-built-up Peugeot, which was on its maiden voyage.

Today I went out and got some Liquid Wrench for next time. Thanks, Cory.

The VCU Bike Fabricators Club

I started a framebuilding club here at school with my engineer buddy Landon.

We're having the first meeting Saturday, March 1st, at 4 pm in the Commons, Virginia Commonwealth University, 907 Floyd Avenue, Richmond, Virginia, United States, North America, Earth, Milky Way, Universe, Reality.

Local framebuilder Ed Jones of Cycles Ed in Ashburn, VA, will be on hand to answer questions and talk about what he does.

All are welcome, especially anybody who can wield a torch.

We're not officially able to teach anything...our future events will probably be "open shop" times, so you'll be able to experiment on your own, use our tools, and exchange ideas with other folks.

Everyone who wants to work will need to at least possess basic basic shop know-how, especially regarding safety. In order to use a tool like a lathe, torch, or mill, you'll need to show that you know how to run the thing.

Also, we're talking about co-sponsoring a lecture series/symposium late this year/early next, possibly on frame design, possibly involving non-local framebuilders. So, basically what I'm saying is that we completely have everything planned out completely.

--

Google group/email list
Facebook group
the Facebook event for Saturday

--

Guess what I'll be wearing to the meeting?

(see previous post)

Signal Cycles

has some sweet-ass t-shirts available for purchase by emailing the oh-so-helpful Matt:


I got mine for $19 delivered. It seems kinda long. Then again, this is as close to framebuilding chic as it gets, so I'll quit bitching.

Signal's blog is also recommended, but lacks an RSS feed...so you have to keep checking their site directly to get updates.
Puh-leeze. What is this, 2001? I want my sweet, sweet framebuilding content shoved directly down my throat.

Correction: they apparently do have a feed, but my Firefox wasn't picking up on it. Thanks, reader.

Sheldon Brown

I need to take a minute here.
Sheldon Brown died yesterday evening.

I found his website when I got my first real adult bike, in the summer of '06. His info got me started on bikes, and so much has been an extension of those hours spent in the basement of my sister's townhouse--studying that beat-up old Peugeot, then Sheldon's site, then the Peugeot again.

Sheldon's blog, updated yesterday. And his inspiringly upbeat take on MS.

It was always a little odd to communicate with him by email. He had his own way of getting a point across, which was always direct.
Now I can see that I was a little nervous whenever I wrote him--I was simply starstruck.

Sheldon was an example of the kind of man I hope to be one day. He loved his family dearly, as his website shows. He was a thinker, an intellectual even, but he also had a knack for practical and the mechanical. That combination has become rare these days, and there is a generation of folks like me that are lucky to have had Sheldon around to share with us.

To my mind, no one individual could claim more responsibility for the popularity of fixed gear bikes. Sheldon preached the fixie sermon. Enough bike geeks tried it, and liked it, that a couple of the cool kids caught on. Now young folks in skinny jeans crisscross this town and every other. Some of us are going to grow up and become the next generation of bike consumers, and it will be interesting to see how Sheldon continues to influence us in 20 or 30 years.

My kind of riding

...reminds me of flying across DC last winter, before knee problems and moving to Richmond...

J P Valiensi Fork Bender Photos

The smallest one is a 4" diameter.

James' site is here
He sent these after I asked him about the fork on this bike


Fork Jig/Fixture Hall of Fame

First up is Marc Pfister's, made mostly from 8020 aluminum extrusion.
A nice, simple design, but I don't like having to rely on manually aligning the thing every time it's set up. Others on Frameforum have taken issue with the accuracy of the McMaster-Carr alu V-block Marc uses.

--

Thanks to Jon K of Jonny Cycles, there's several pictures of his old Bringheli jig attached to this Frameforum post.


plus several in-progress pics from his list of completed frame projects:


This is my favorite of what I've seen so far. I can probably get most of the materials from various scrap bins, and I don't imagine the machining will be terribly hard.

edit: another couple pics of a different version, thanks to Anderson Custom Cycles.

edit: according to Jon's "for sale" post to the Fb's list, the Bringheli has the following specs:
Works with 1" and 1 1/8" steerers, but the scale to set the rake only works w/1".
Max fork length (center of axle to top of crown race seat): 445mm
Rake: 0-87mm

--

Ahren Rodgers, who also works in the Jonny Cycles space and makes some of the Velo-Orange frames, has a more deluxe jig, incorporating an Anvil dummy axle:


Again, more from the Jonny Cycles archives:


More complicated than I'm looking for, but cool regardless.
According to the original post, this was made by Matt Sheridan of Seven Cycles.
Ahren is part of the Madison Framebuilders group, and also does work under the Banjo Cycles name.

--
Chris Irlam has a nice simple design over at his blog. He's also put plans up on Frameforum.

--

edit:
No discussion of commercially-available fork jigs would be complete without mentioning the Anvil Fork Fixture. It's $850 and it shows. Pics here.

--

edit:
Just found a couple photos of Doug Fattic's jig over at Nate Knutson's photosite: